XTASY D is an all in one Kodi video addon that provides a great range of contents to stream on Kodi. This addon can be downloaded from the Saturn repository. The addon has contents in various categories including Movies, TV Shows, Music, Magic, Extreme Sports, Food, Paranormal, Fitness, Guinness World Records and more. You can find almost all type of contents in this addon. XTASY D Kodi addon can offer you with endless entertainment than ever. Instead of installing many addons, it’s better to install the XTASY D addon that offers all sort of contents. In this article, we will show you how to install XTASY D addon on Kodi Leia 18.2 and Krypton 17.6 Versions.

Why you need a VPN for Kodi?
In Kodi, Streaming through the third party addons are risky. Since your IP address will be visible to your service provider, they can easily monitor your online streaming activities. And many addons have restrictions based on geographical locations. You can bypass these restrictions with the help of VPN. There are many VPN services available, but we recommend you to use ExpressVPN, which gives you full protection and keeps your online activities untraceable.
How to Install XTASY D Kodi Addon?
Installing XTASY D Addon on Kodi is simple. Follow the instructions below to install the addon on your Kodi compatible devices like Windows, Mac, FireStick and more.
Prerequisite: Before installing any third-party addons, you need to enable the Apps from Unknown Source option on your Kodi. To do this Go to Settings > System Settings > Addons > Unknown Source > Turn the option On.
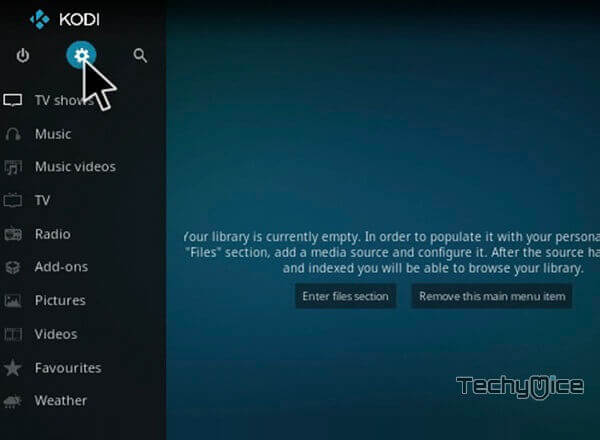
Step 1: Launch your Kodi Media Player and open Settings.
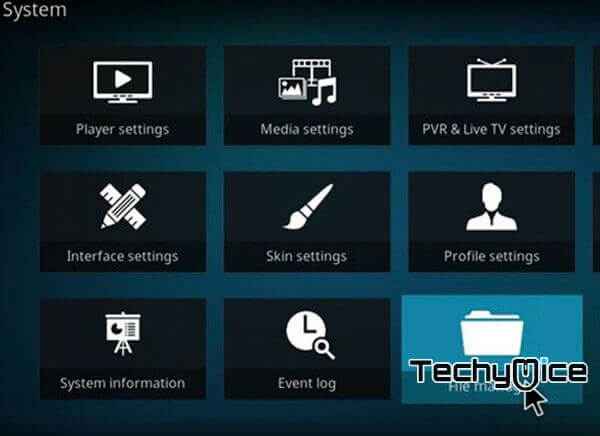
Step 2: Open File Manager in the settings window.
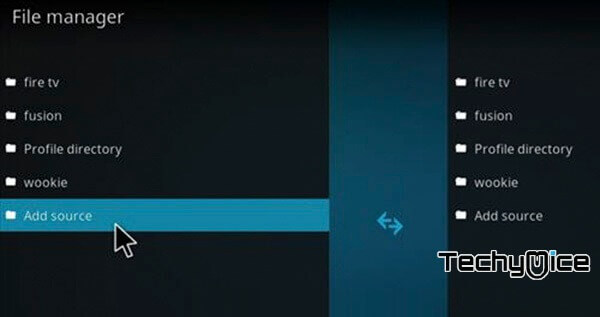
Step 3: Then click on the Add Source option from the left side menu on the screen.
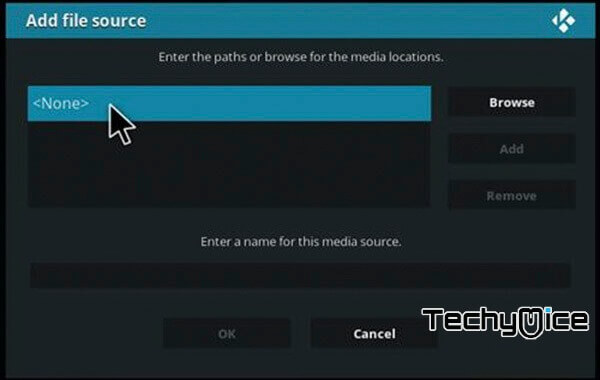
Step 4: Tap on the <None> option and click OK button.
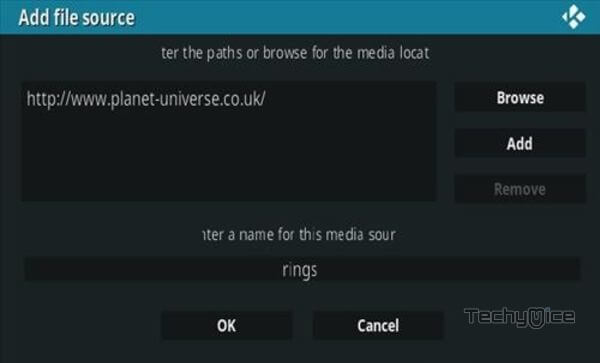
Step 5: Now type in the XTASY D Repo URL: http://www.planet-universe.co.uk/ and click on OK button.
Read: How to Install The Crew Kodi Addon Leia 18?

Step 6: Enter the Name for the repo rings and Click OK button.
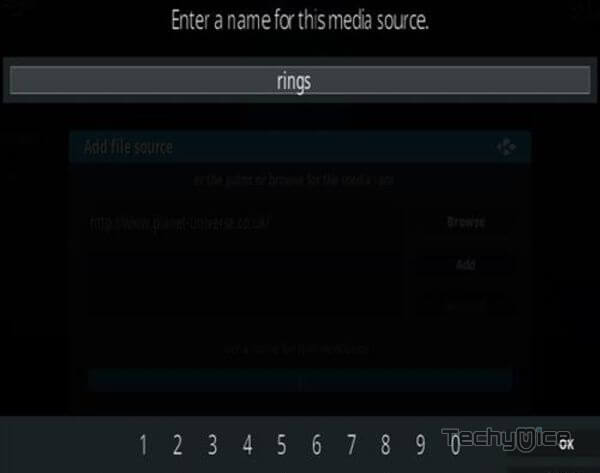
Step 7: Check whether the entered details are correct and then click on the OK button.
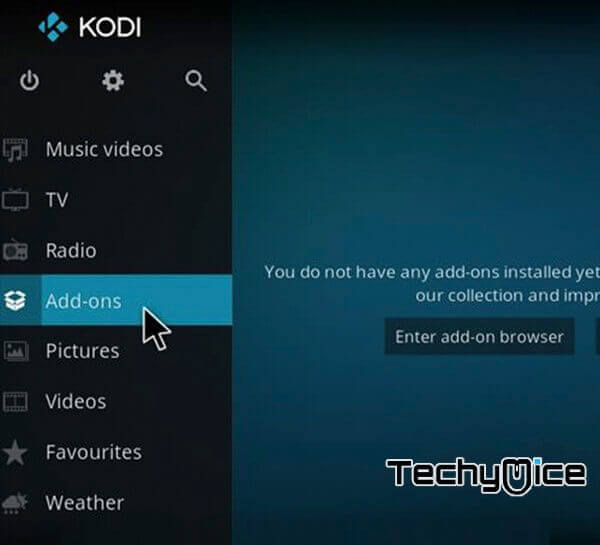
Step 8: Now go back to the home screen of Kodi and Click the Addons option.
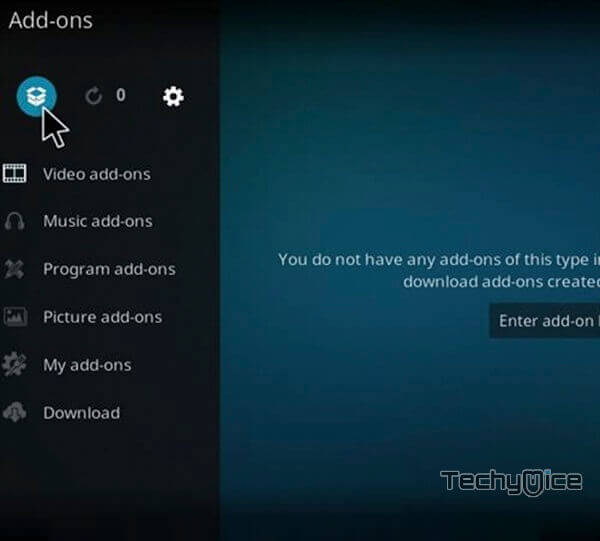
Step 9: Open the Package Installer, that you can find on the top left corner of your Kodi app.
Step 10: Click on Install from zip file option.
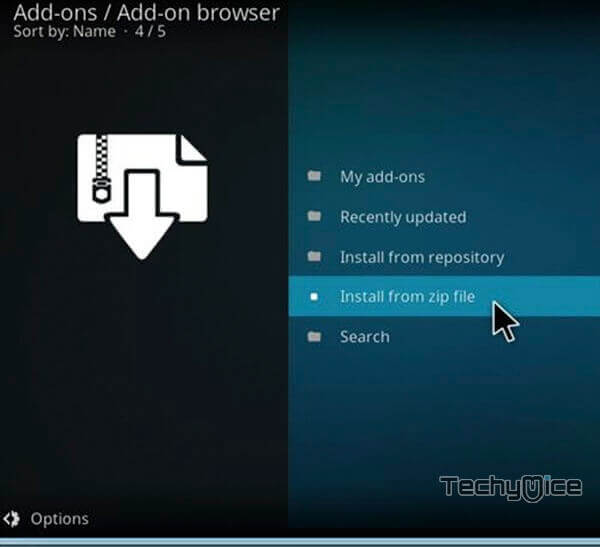
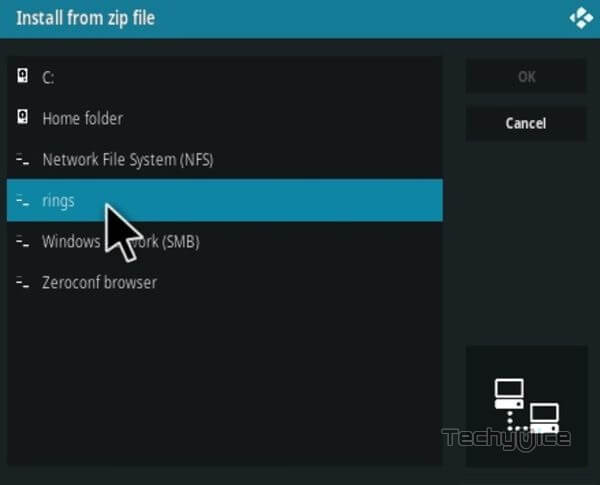
Step 11: Now you can see a pop-up window, just select the rings.
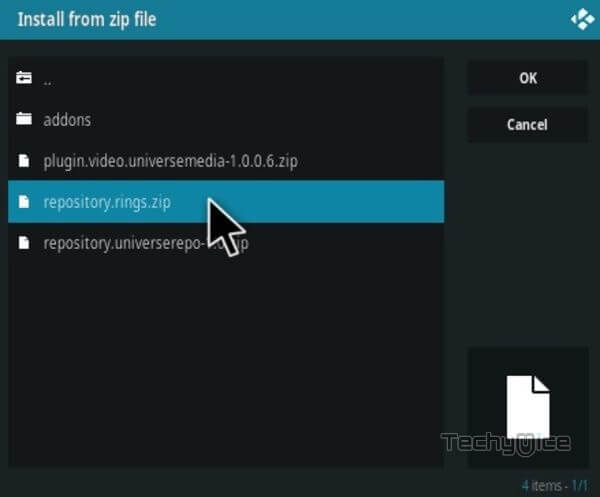
Step 12: Click on the XTASY D Repo zip file repository.rings.zip and Click on OK button.
Step 13: Wait for few minutes until the Repository gets installed on your device. Once it completes you will be notified with a pop-up on the top right corner of the screen.
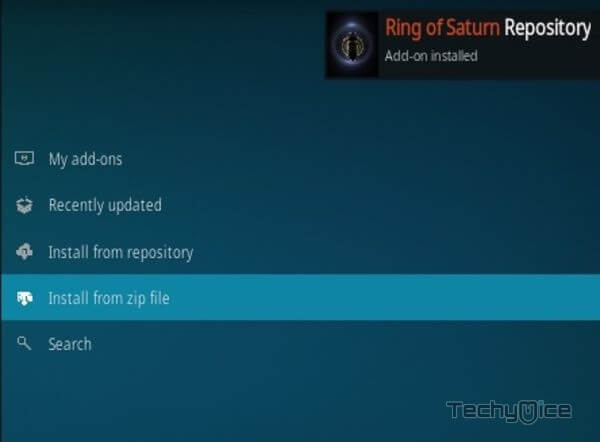
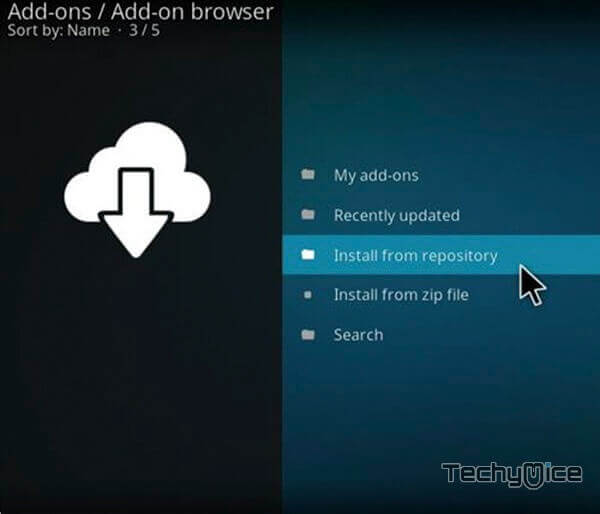
Step 14: Click on Install from Repository Option.
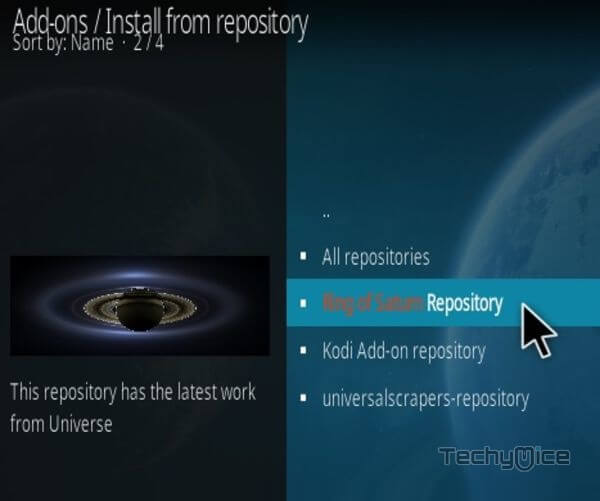
Step 15: From the list of available repositories select the Ring of Saturn Repository.
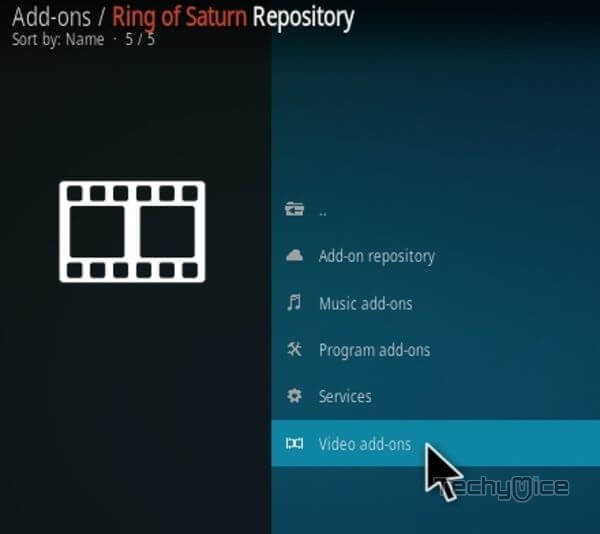
Step 16: Click on Video Addons to open it.
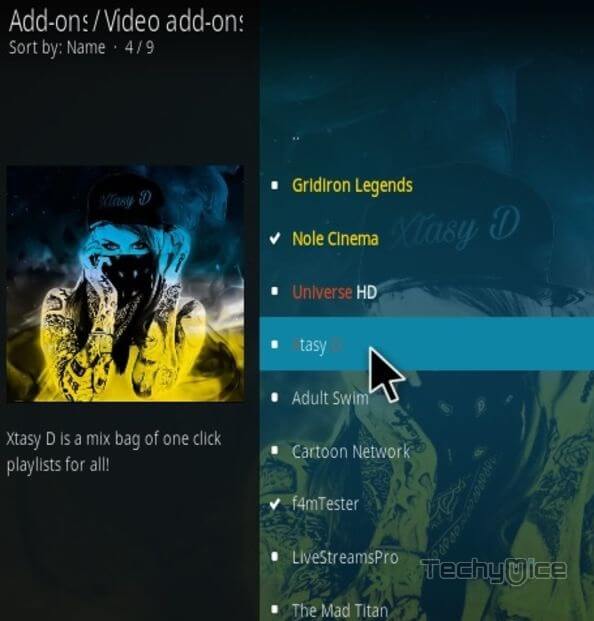
Step 17: Now click on the XTASY D Addon from the list of video addons.
Step 18: Now Click the Install button to install XTASY D Addon on Kodi.
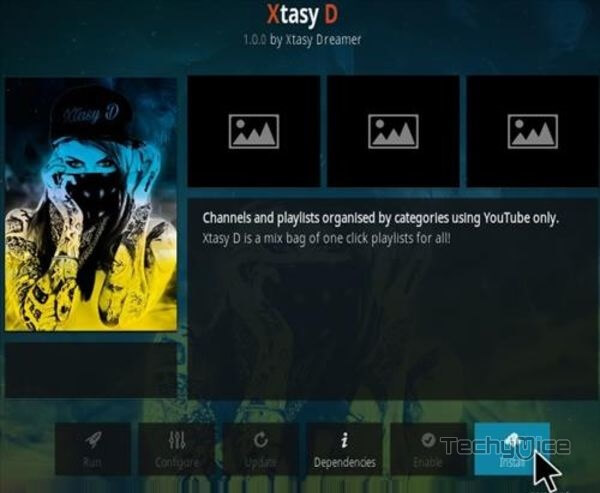
Step 19: If you are Kodi 18 Leia user, then you will be displayed with a pop up contains all dependencies and addons, Simply click on OK to install.
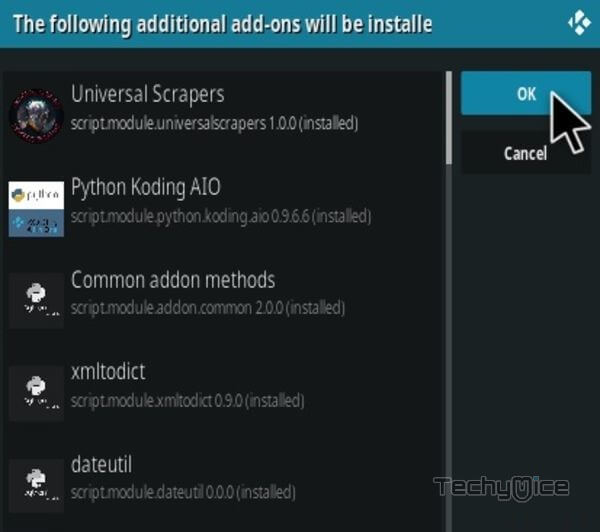
That’s all, Now you are ready to stream your favourite media on your Kodi installed devices.
To Conclude
XTASY D Kodi Addon is a perfect option for many Kodi users. Since the addon contains a wide range of sections, You can watch almost anything you need on this addon. Moreover, it scrapes the content from high-quality links, that delivers video in high definition formats. It is one of the addons that offer reliable streams. We hope this article, helped you to install XTASY D addon on Kodi. You can use this guide to install this addon on Windows, FireStick, Android and more.
Thank you for reading this article. If you have any queries, please leave a comment below.

I always want to install different addons on Kodi, but I’m not that advanced in IT sphere so I tend to use instructions which is why I was super happy to stumble upon this gem, which made my life so much easier. After reading this I also decided to get Surfshark which was the cheapest VPN option I could find and so far I haven’t had any major complains