Bubbles Kodi Addon is one of the most used Kodi video addons, that offers a wide range of movies and TV shows. Apart from these, the addon offers live TV channels that allows you to watch your favourite events on live. Bubbles Addon has integration with Real-Debrid, Premiumize and EasyNews So that it is easier for you to access your favourite programs without any hassle. This makes the addon much more capable and lets you stream almost any contents that you like to stream. With this setup, the Bubbles Kodi Addon will become a part of your favourite collections. In this article, we will show you how to install Bubbles Kodi Addon on your devices.

Why you need a VPN for Kodi?
VPNs are the most necessary thing when streaming through Kodi addons. It hides your identity and makes you anonymous. This helps you to prevent yourself from snoopers. Moreover, you can access all the geo-restricted contents easily with the help of VPN. There are plenty of VPN services available, but we recommend you to use ExpressVPN. This gives you great protection and faster access speeds.
Read: How to Install Distro TV Kodi Addon?
How to Install Bubbles Kodi Addon?
Installing Bubbles Addon on Kodi is easy. Follow the instructions below to install the addon on your Kodi compatible devices like Windows, Mac, FireStick and more.
Prerequisite: Before installing any third-party addons, you need to enable the Apps from Unknown Source option on your Kodi. To do this Go to Settings > System Settings > Addons > Unknown Source > Turn the option On.
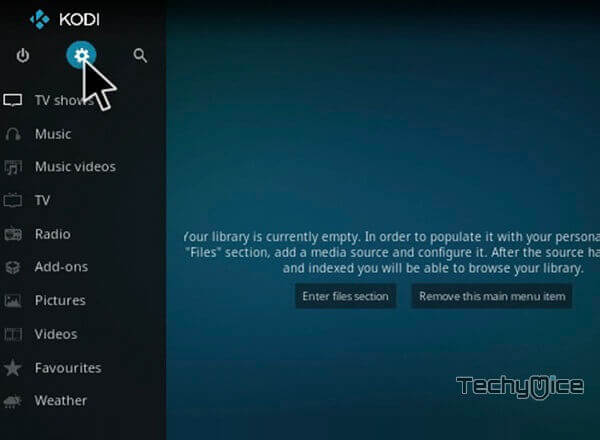
Step 1: Launch your Kodi Media Player and Open Settings.
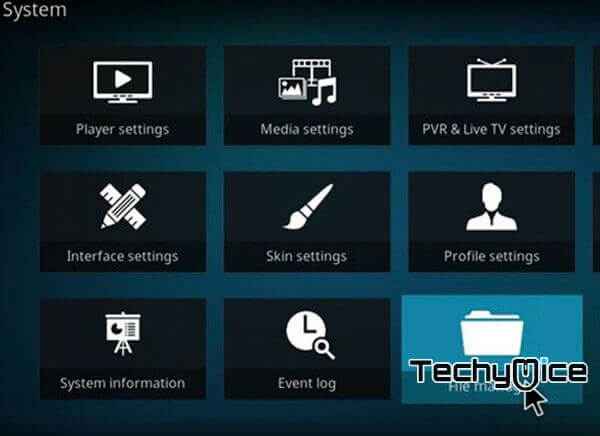
Step 2: Open File Manager in the settings window.
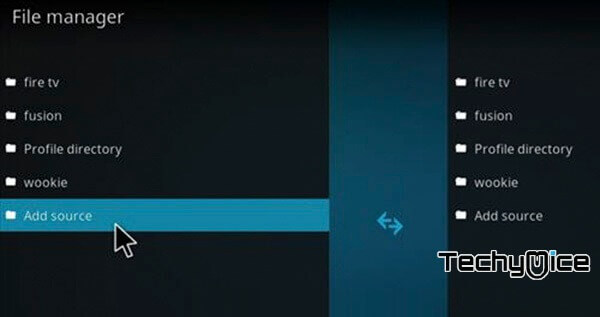
Step 3: Then click on the Add Source option from the left side menu on the screen.
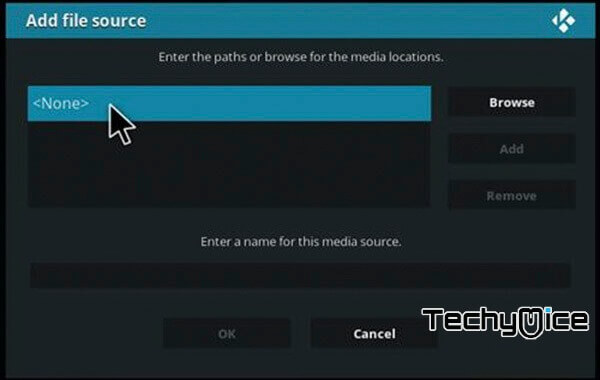
Step 4: Tap on the <None> option and click OK button.
Read: How to Install 4K Kodi Addon on Nexus?
Step 5: Now type in the Bubbles Addon Repo URL: https://archive.org/download/repository.bubbles.1-2.0.0/ and Click on OK button.
Step 6: Enter the Name for the repo Bubbles and Click OK button.
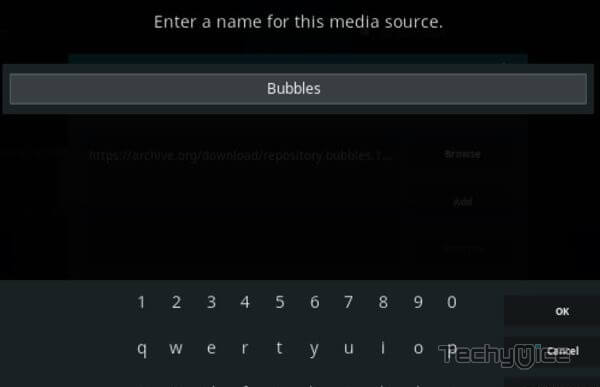
Step 7: Check whether the entered details are correct and then click on the OK button.
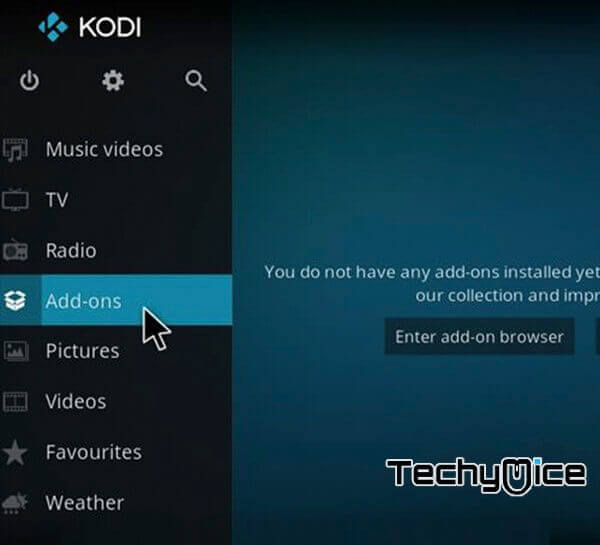
Step 8: Now go back to the home screen of Kodi and Click the Addons option.
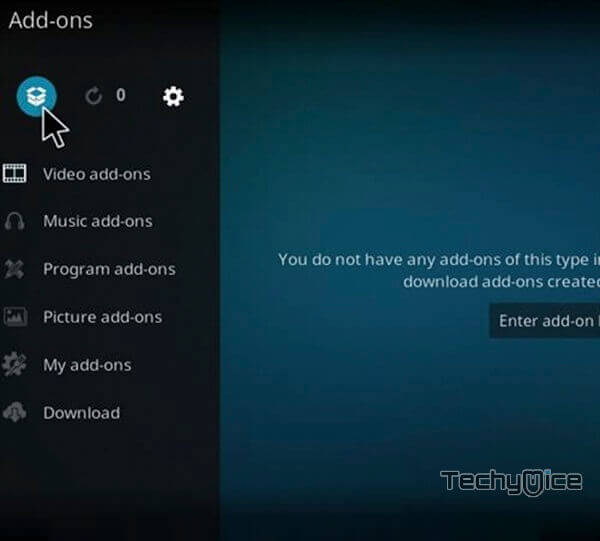
Step 9: Open the Package Installer, that you can find on the top left corner of your Kodi app.
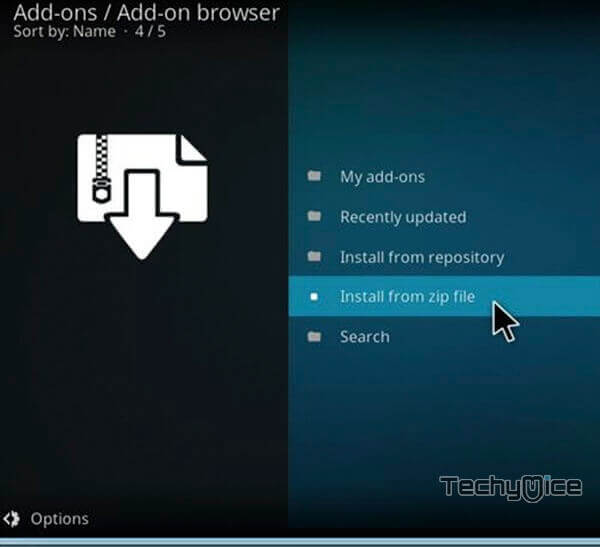
Step 10: Click Install from zip file option.
Step 11: Now you can see a pop-up window, just select the Bubbles repo.
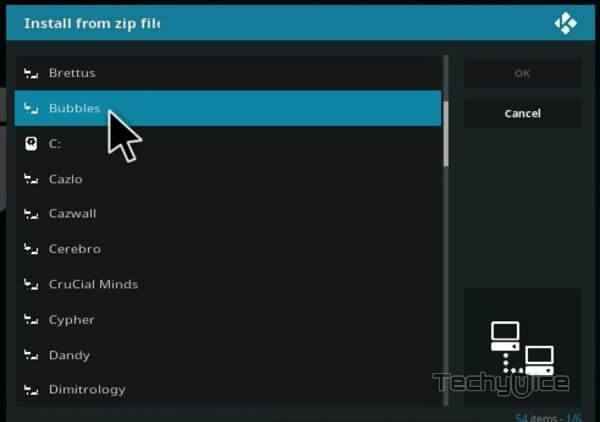
Step 12: Click on the Bubbles Repo zip file repository.bubbles.1-2.0.0.zip and Click on OK button.
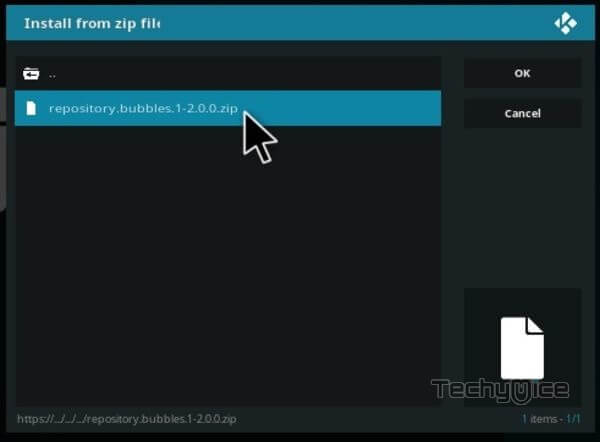
Note: The version of the Repository may vary when it gets an update.
Step 13: Wait for few minutes until the Repository gets installed on your device. Once it completes you will be notified with a pop-up on the top right corner of the screen.
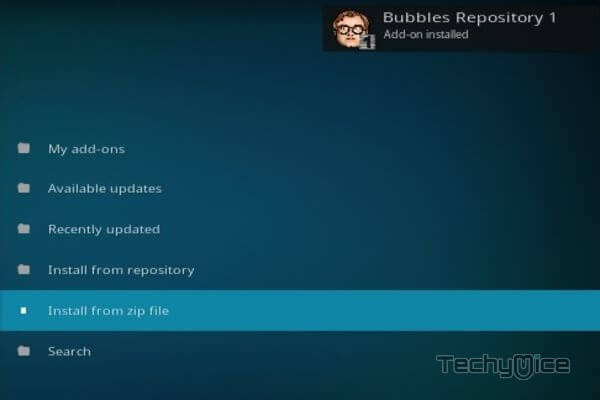
Step 14: Click on Install from Repository Option.
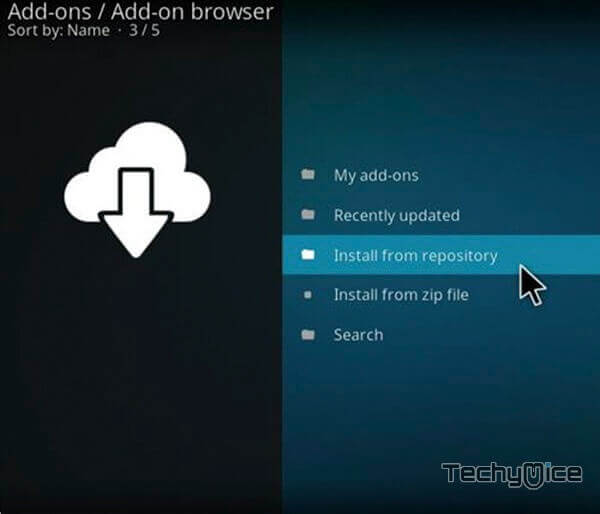
Step 15: From the list of available repositories select the Bubbles Repository.
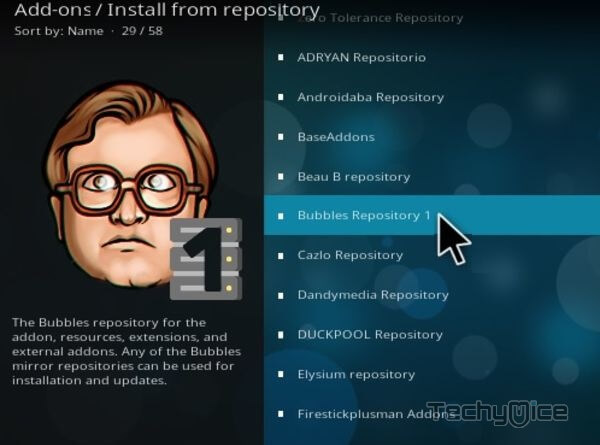
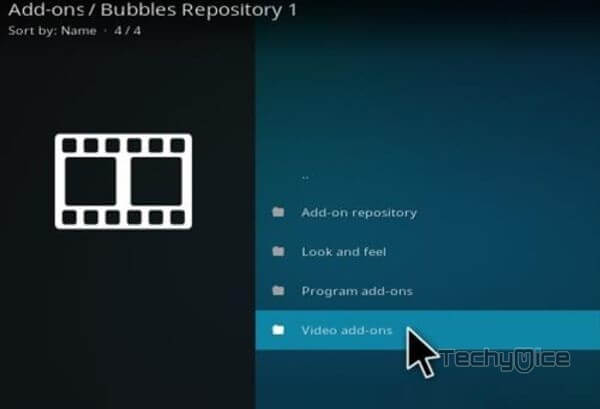
Step 16: Click on Video Addons to open it.
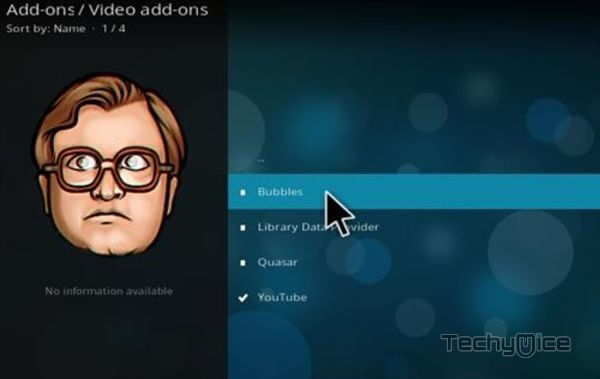
Step 17: Now click on the Bubbles from the list of video addons.
Step 18: Now Click the Install button to install Bubbles Addon on Kodi.
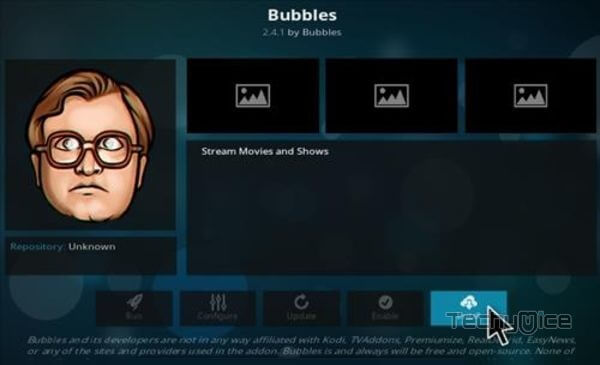
That’s all, Now you are ready to stream your favourite media on your Kodi installed devices.
Wrap Up
Bubbles Kodi Addon is mostly used for streaming Movies and TV shows on Kodi installed devices. But the addon has more contents to explore like Live TV channels. You can find high-quality channels and stream them seamlessly. The integration with premium services allows you to stream contents without any limitations. You can find and stream lots and lots of contents through this addon. We hope that you have managed to install Bubbles Kodi addon on your devices. You can use this guide on Kodi Leia 18.9/18.1 and 17.6 Krypton versions.
Thank you for reading this post. For further queries, please leave a comment below.

![How to Install CBS on FireStick? [Updated 2024] How to Install CBS on FireStick? [Updated 2024]](https://www.techymice.com/wp-content/uploads/2023/03/How-to-Install-CBS-on-FireStick-2-60x57.jpg)